Screens
The screens page is where you set up a new screen or edit an existing screen. Generally you shouldn't need to change many settings after your intial set up is complete.
Refer to the Screen Setup guide for details on how to set up a screen.
The Screens overview shows a list of all the screens including the size (in pixels and tiles) and the number of tiles.
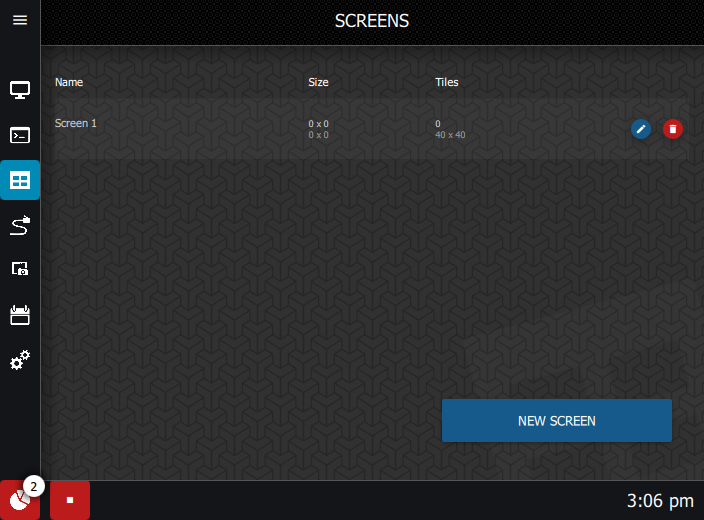
Click the delete icon to delete a screen or click the New Screen button to create a new screen. In order to create or delete a screen, the screen must be stopped. The new screen button will not be visible when the screen is running.
Click the edit icon to edit a screen. You will be able to edit the Screen's Settings, Sections and Target.
Settings
Settings is where you can review the settings that were applied during setup. Generally, these settings should not need to be changed once you are set up.
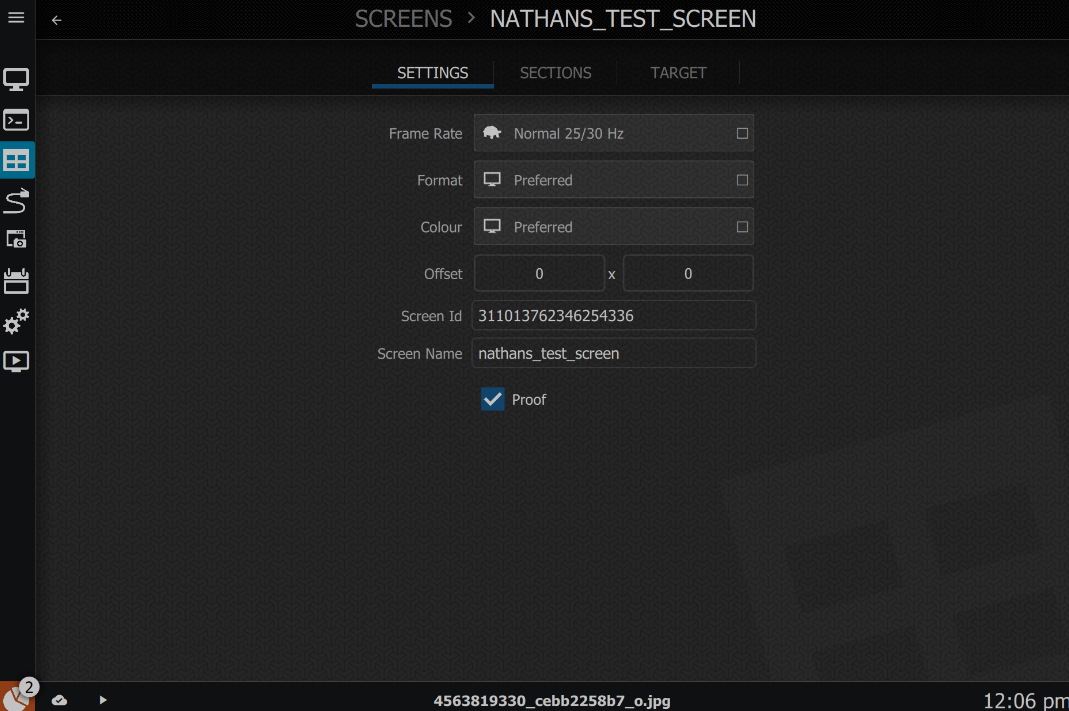
Frame rate: You will probably want to leave this at the default of Fast 50/60 Hz. Lowering this number will reduce the load on the computer/network but may result in lower-quality output. If your screen is flickering, you can try adjusting this value.
Format: This determines the way that the intensity of the screen is calculated. You should leave this on the default setting of Preferred.
Colour: The colour space setting determines which standard the controller will use to display colours accurately. If you choose the default of Preferred, the controller will determine the best option.
Offset: This changes where on the screen the scrape is getting the picture to send to the tiles. You shouldn't need to change this unless the source is out of alignment with the scrape.
Screen ID and Name: The Screen ID is assigned to the screen when you set it up in the ON Cloud Platform. The Screen Name is a user-friendly name that you choose when setting up the screen. Once set, these fields should not be changed.
Proof: Turns the Proof of Display on or off for each individual screen. We recommend turning this setting on to track the images that are displayed. Master controls for Proof are in Settings.
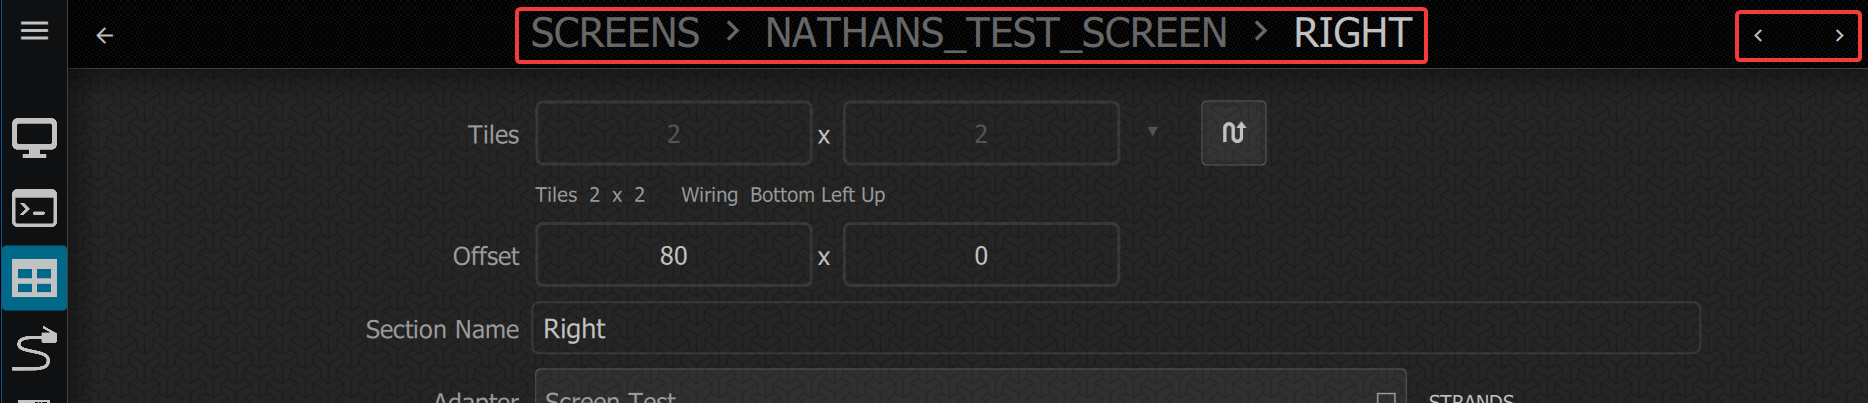
Sections
The Screen Sections menu is where the layout and settings for each section can be found. See more details about Sections in the Screen Setup guide.
You can navigate through multiple sections by using the back/forward arrows in top right. You can also click the breadcrumb links to change menus.
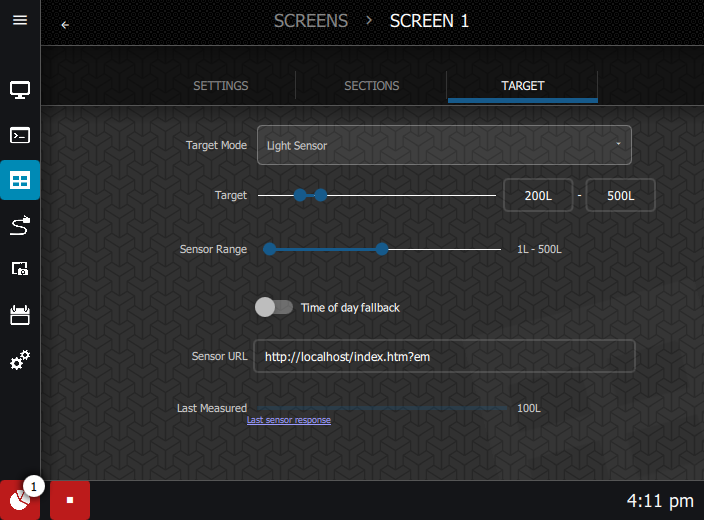
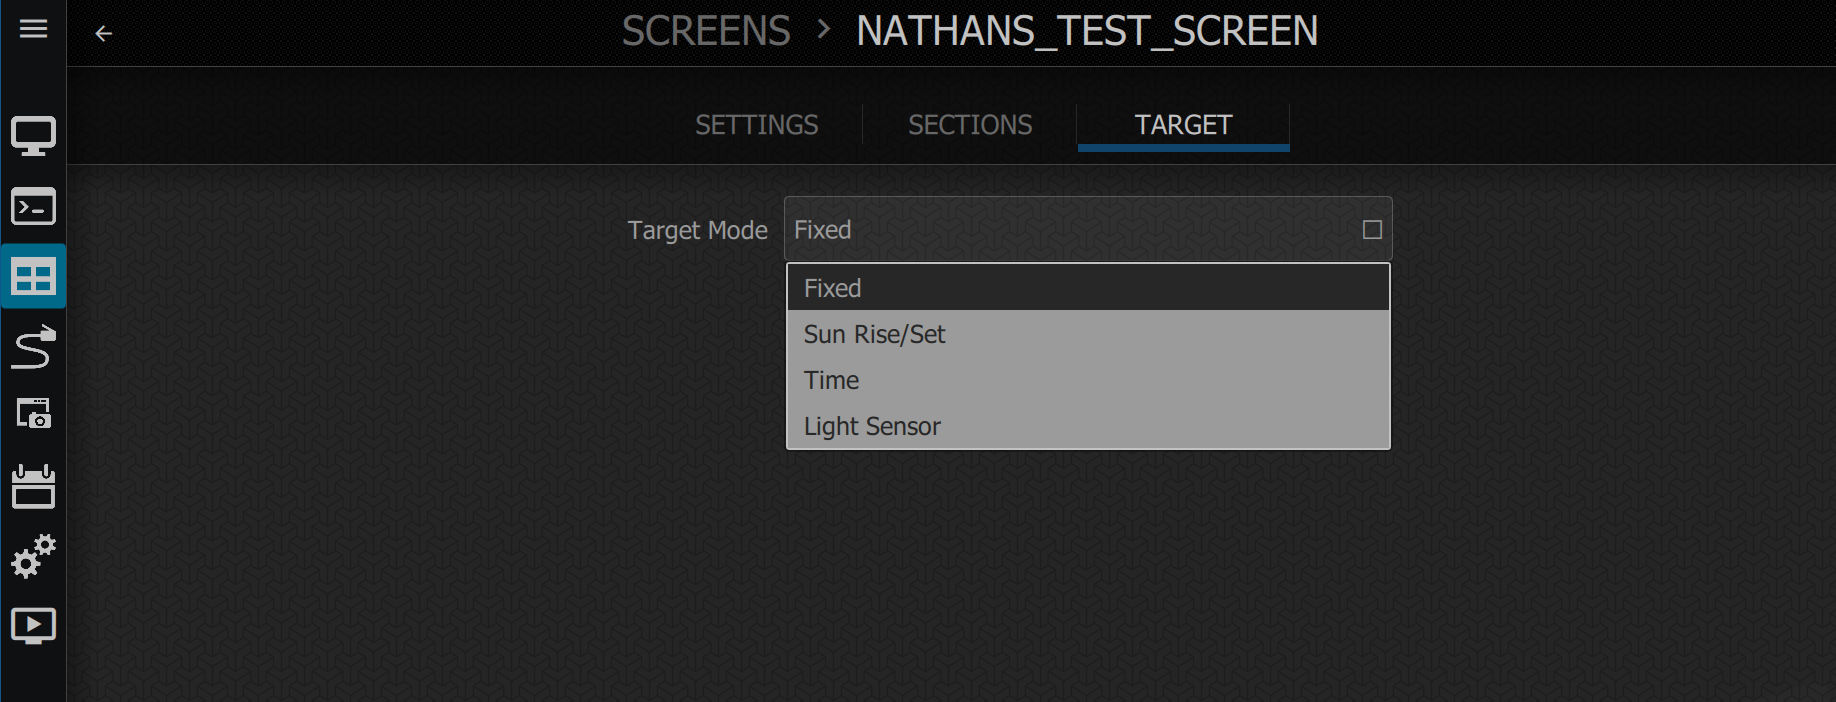
Target
The Target mode specifies how the screen will apply the Target settings.
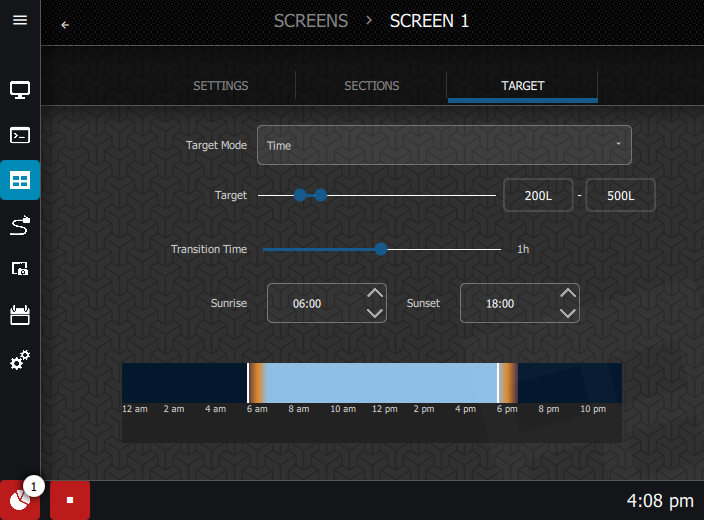
The target itself is not generally changed. The maximum level of light allowed is generally governed by the local regulatory body (i.e. the council may only allow certain brightness levels in certain areas of a city). At 100% brightness, this could be the equivalent of 6000 lumens during the day and about 200 lumens at night. It will vary based on the rules in the screen's location.
Fixed sets the Target value to a specific figure and it doesn't change while the screen is running. The value is set from the home screen when using this setting.

Sun Rise/Set will set the screen to automatically change brightness at certain times of day based on the sunrise and sunset times where it's located. A location needs to be entered from the Settings menu for this to calculate correctly. The screen will gradually increase luminance prior to sunrise and decrease luminance after sunset. You can set the period of time it takes to transition from day lumens to night lumens.
The sun rise/set funtion is primarily to avoid light pollution at night, and to decrease the brightness so that drivers are not 'blinded' by screens near roads. For outdoor screens, this is the most commonly-used setting.

Time allows the user to set the sunrise and sunset times manually.
Light Sensor will tell the system to base the target used on the sensor readings.