Screen Setup in ON Cloud Platform
Now that the adapters are set up in both Windows and LEDNet, the screen(s) can be configured in the ON Cloud Platform.
Only an ON Cloud Platform Admin User can set up a screen. Log into the ON Cloud Platform using the appropriate account and click the Admin module and then the Screens menu. From the Screens menu, click the New Screen button.

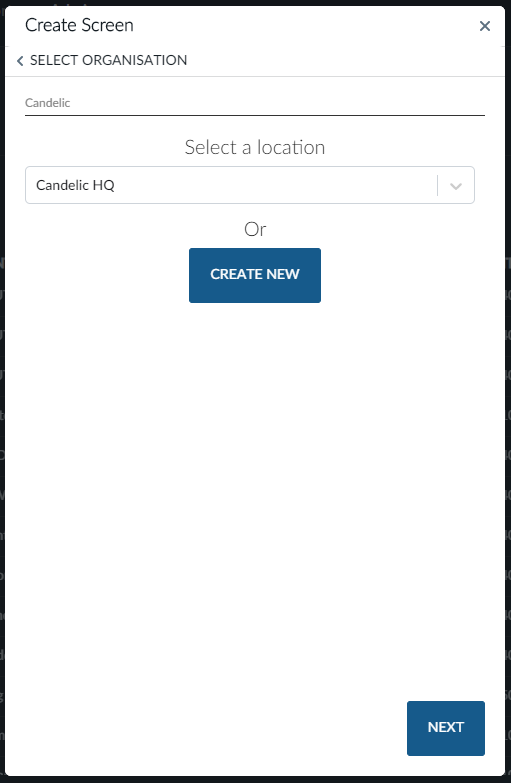
Select the associated organisation (if you manage screens for multiple organisations), associated location and associated controller and then click the Next button to input the Screen Details.

If the organisation, location or controller needs to be set up, click Create New to do so.
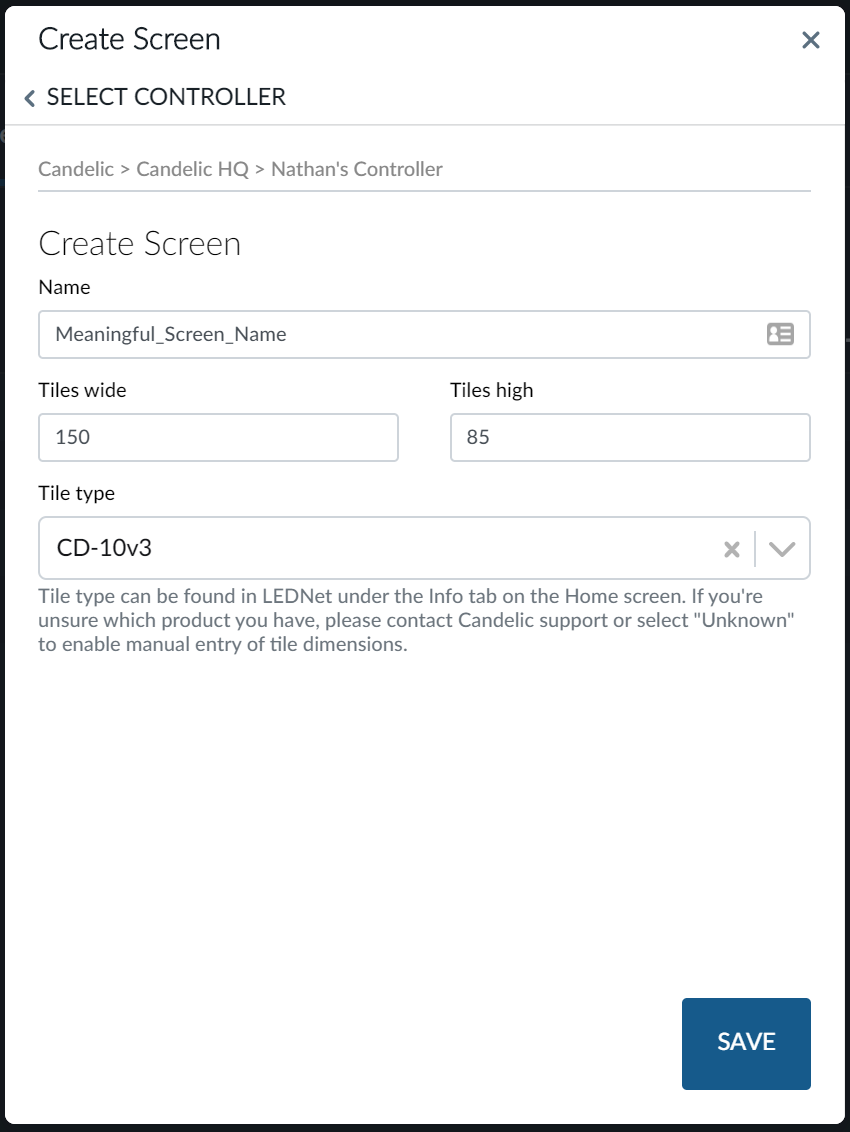
The details entered here will be used throughout the system so ensure they are correct. Fill in the number of tiles that make up the screen width and height and choose a tile type. The system will use the tile type to calculate the screen resolution.

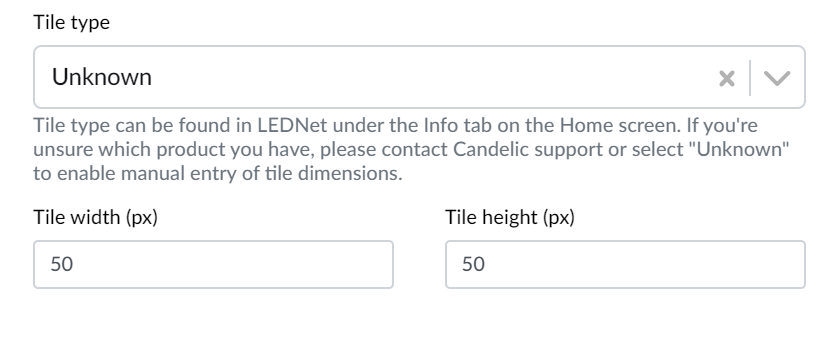
If your tile type isn't shown you can choose Unknown and enter the height and width of the tiles in LEDs.

Click Save when you have entered all details.
Creating the screen in the ON Cloud Platform will create a unique ID for the screen that will be used in the next phase of set up, creating the screen in LEDNet.
For more details about the ON Cloud Platform, including how to edit and delete screens there, visit the ON Cloud Platform Manual.